In this post, I'll give a step-by-step tutorial on how to get started running Deep Learning code using Pytorch, Tensorflow, and JupyterLab on the GPUs available in the WashU RIS cluster.
Getting Access
First, you will need to get access to the RIS Cluster. Each faculty gets 5TB of free storage on the RIS Storage Cluster and access to open CPUs and GPUs on the Compute Cluster (which is currently free, but will eventually be $100 per person per year) . If you're a student, you will simply be assigned access to your advisor's resources. To request access, submit a ticket at https://jira.wustl.edu/servicedesk/customer/portal/2/. This process will probably take a few days, and you'll need your advisor to oversee the process.
Setting up Docker
Next, create an account on Docker Hub. Inside Docker Hub, create a new repository called <docker-username>/<repo-name>. You will need to make sure this repository is public - otherwise you won't be able to use it for RIS. Don't worry, just because the repository is public doesn't mean any of your data or code is exposed, just your computer settings and package management. Then, download Docker Desktop and sign in with your new account.
Somewhere on your local computer, create a folder called docker (e.g. ~/Documents/docker). Inside this folder, create two files called environment.yml and Dockerfile.
environment.yml will define a Conda environment which will have all the dependencies that you need for your code. For example, for my research, I use the following environment.yml. If you have other requirements that you need, you can edit the file to add or remove them. Note that I've marked torch as a pip install instead of conda, since I wasn't able to get conda pytorch-cuda working inside the RIS cluster. I'll update this if I find a fix.
Update 5/17/23: I have been encountering issues with the latest version of Tensorflow (2.12) in conjunction with this setup. I can confirm that Tensorflow 2.8 works on the Jupyter compute environment, and I suspect that 2.11 will work too though I haven't tried it myself.
dependencies:
  - jupyterlab
  - ipywidgets
  - numpy
  - scipy
  - scikit-learn
  - pandas
  - matplotlib
  - seaborn
  - h5py
  - hdf5plugin
  - zstandard
  - tensorflow
  - bokeh=2.4.1
  - pip
  - pip:
    - jupyterlab-nvdashboard
    - jupyterlab-tensorboard-pro
    - tensorflow==2.8
    - torch
    - pytorch-lightning
    - pytorch-optimizer
    - chess
For your Dockerfile, use the following code. If you haven't used Docker before, this is essentially a configuration which specifies what our computer environment will look like. The first line tells us that our base environment uses the Ubuntu 20.04 operating system, preinstalled with cuda. You can find this container at https://hub.docker.com/r/nvidia/cuda. The next block of code installs various commands that you likely need when using an operating system, like wget, git, and vim. If you have other requirements, feel free to add them to the apt-get install line. Next, we install Mambaforge, which is a package manager almost identical to Anaconda, except it's smaller and faster. Finally, we add the packages defined in environment.yml.
FROM nvidia/cuda:11.5.1-base-ubuntu20.04

ARG DEBIAN_FRONTEND=noninteractive
RUN apt-get update --fix-missing \
  && apt-get install -y wget bzip2 git vim build-essential ca-certificates libglib2.0-0 libxext6  libsm6 libxrender1 libstdc++6 \
  && apt-get clean

RUN wget https://github.com/conda-forge/miniforge/releases/latest/download/Mambaforge-Linux-x86_64.sh -O ~/mambaforge.sh && \
  bash ~/mambaforge.sh -b -p /opt/conda && \
  rm ~/mambaforge.sh && \
  /opt/conda/bin/conda init

ENV PATH=/opt/conda/bin:$PATH

ADD environment.yml /tmp/environment.yml
RUN mamba env update -n base -f /tmp/environment.yml
Once you've created your two files as defined, it's time to push the container to Docker Hub. Making sure you're signed into Docker Desktop, you can simply run the command
docker build -t <docker-username>/<repo-name> . && docker push <docker-username>/<repo-name> in your terminal, in the same directory as your environment.yml and Dockerfile. Depending on how complex your container is, building and pushing could take anywhere from a few minutes to a few hours.
Using the Compute Environment
To access the RIS cluster, you will need to be on the WashU VPN. Instructions on how to do so can be found at https://it.wustl.edu/items/connect/.
Once you're on the VPN (and you have access to the compute cluster , you can SSH into the compute environment with the command ssh <wustl-key>@compute1-client-<N>.ris.wustl.edu, where <key> is your official WUSTL key, and <N> can be any number from 1 to 4 (e.g. <wustlkey>@compute1-client-4.ris.wustl.edu).
Once you've logged in, you are placed into a login node. This is essentially a server where you can launch and view jobs which run your code. However, the login node isn't intended as a computer to run intensive code directly, so you'll have to learn how to submit jobs. I'll go over that in the next section.
While you're in the compute environment, you'll have to get used to all the commands and options. Personally, the commands I use most often are bsub which creates a new job, bjobs which displays your running jobs, and bkill which kills a running job. To see the options for these commands, go to the IBM LSF documentation.
The other thing to note is that your RIS Storage Cluster is available at /storage1/fs1/<faculty-key>/Active, where <faculty-key> is your advisor's WUSTL key.
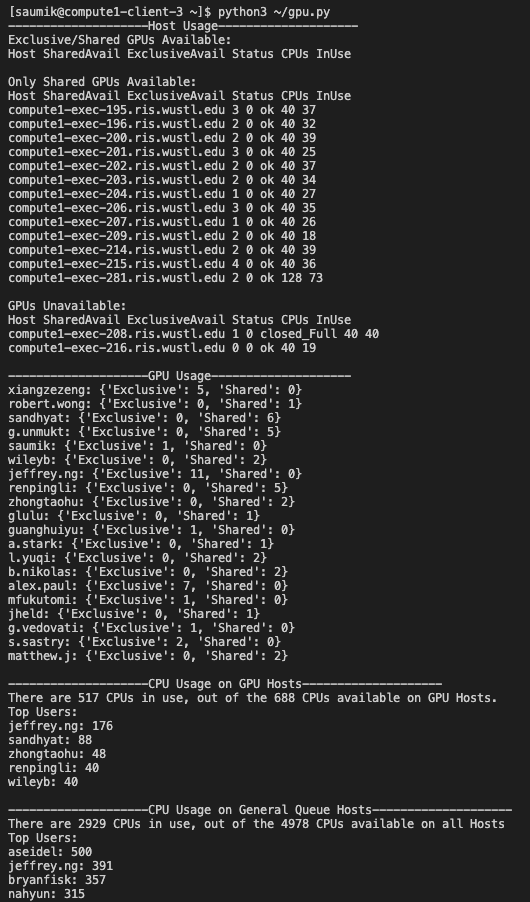
I created a script called gpu.py, which allows you to view status of the cluster. You can use it by running python3 gpu.py. This is very helpful to see how in-use the cluster is, and can tell you potentially why your jobs aren't landing, if there are open GPUs or CPUs, etc.
Creating a Jupyter Lab Environment
In order to create a job running inside of Jupyter Lab with a GPU, save the following script as ~/jupyter-gpu.sh. Note that you'll have to edit the script and replace <faculty-key> with the actual value. You can then run this script using bash ~/jupyter-gpu.sh, which will create your job with some default parameters. You can edit these parameters that your job uses using -p, -c, etc. So for instance, you could run bash ~/jupyter-gpu.sh -c 8 -m "32GB" -g 2 -x yes, which would create a job with 8 CPUs, 32GB of memory, and exclusive access to 2 GPUs. Normally, GPUs are in scarce supply, so its easier to request access to a shared GPU.
#!/usr/bin/bash

port="8001"
cores="1"
memory="10GB"
gpus="1"
model="TeslaV100_SXM2_32GB"
exclusive="no"
select="gpuhost,"
while [ $# -gt 0 ]; do
  case "$1" in
    -p)
      port="$2"
      ;;
    -c)
      cores="$2"
      ;;
    -m)
      memory="$2"
      ;;
    -g)
      gpus="$2"
      select="gpuhost,"
      ;;
    -t)
      model="$2"
      ;;
    -x)
      exclusive="$2"
      ;;
    *)
      printf "***************************\n"
      printf "* Error: Invalid argument.*\n"
      printf "***************************\n"
      exit 1
  esac
  shift
  shift
done

LSF_DOCKER_VOLUMES="/scratch1/fs1/<faculty-key>:/scratch1/fs1/<faculty-key> /storage1/fs1/<faculty-key>/Active:/storage1/fs1/<faculty-key>/Active" LSF_DOCKER_PORTS="$port:$port" PATH="/opt/conda/bin:/usr/local/cuda/bin:$PATH" bsub -q general -n $cores -M $memory -R "select[${select}port$port=1] span[hosts=1] rusage[mem=$memory]" -G compute-<faculty-key> -J jupyter-gpu -gpu "num=$gpus:gmodel=$model:j_exclusive=$exclusive" -a "docker(<docker-username>/<repo-name>)" jupyter lab --allow-root --ip=0.0.0.0 --port $port --no-browser
Once you've submitted this job, you can view it using the bjobs command. Once the job has landed (i.e. the status is RUN instead of PEND), you can run bpeek <jobid>, where <jobid> is the id of the landed job. This will show you the output of the job. The first several dozen lines will just be on pulling the Docker container. After a few minutes, when the container is pulled, you should rerun bpeek <jobid> and you'll get a section that looks something like this:
    Or copy and paste one of these URLs:
        http://compute1-exec-196.ris.wustl.edu:8001/lab?token=0a3dae...
     or http://127.0.0.1:8001/lab?token=0a3dae...
As long as you're on the WashU VPN, you can access your job by going to the first link http://compute1-exec-196.ris.wustl.edu:8001/lab?token=0a3dae... in your browser. You should probably bookmark this link for future access. This job will last for 28 days before it automatically dies, at which point you'll need to create a new job.
Other Details
If you want to submit other types of jobs than the Jupyter Lab script from above, check out the RIS documentation on the bsub command. In general, the RIS docs page is a good resource for help. If you ever need additional help with the cluster that the docs don't cover, you can submit a Jira ticket here, and you'll usually get a response within a business day.
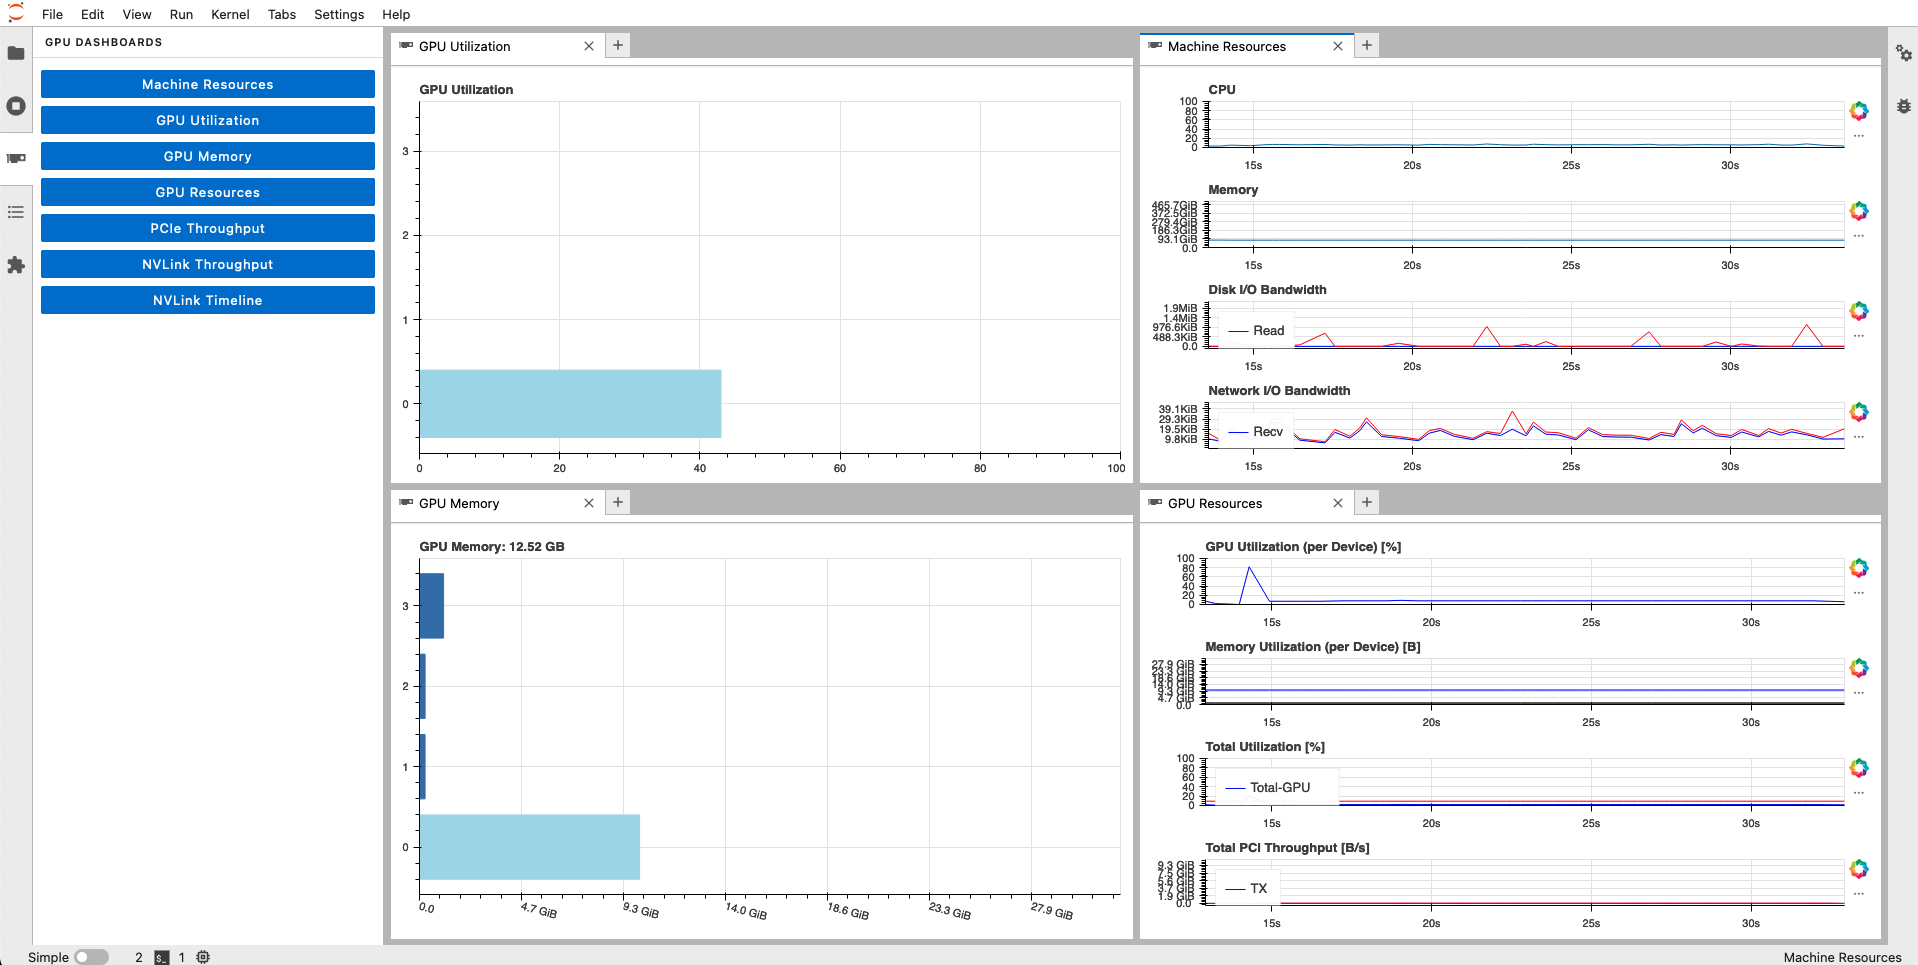
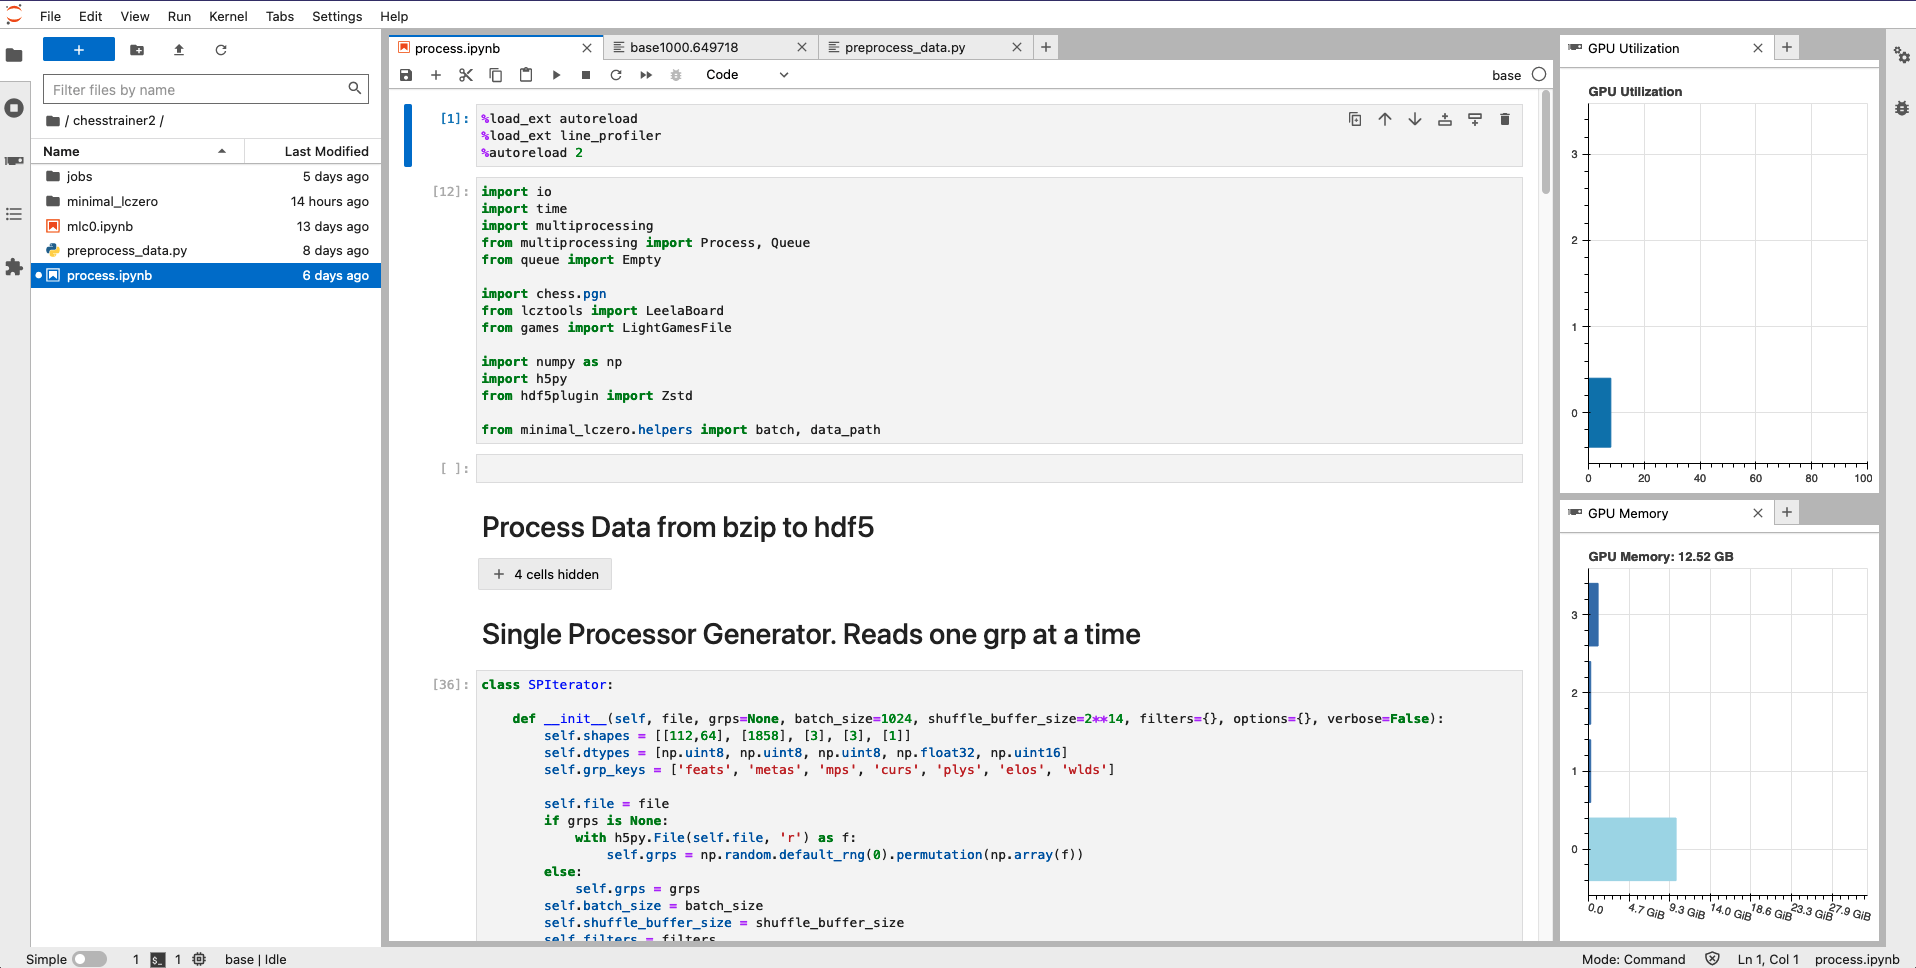
There is an extra option for viewing the status of your GPU memory and utilization in a live dashboard, using Jupyterlab-nvdashboard. However, this seems to be broken in newer Docker containers (see issue). This issue has now been solved, as long as you specify bokeh=2.4.1 in your environment.yml as I did above.
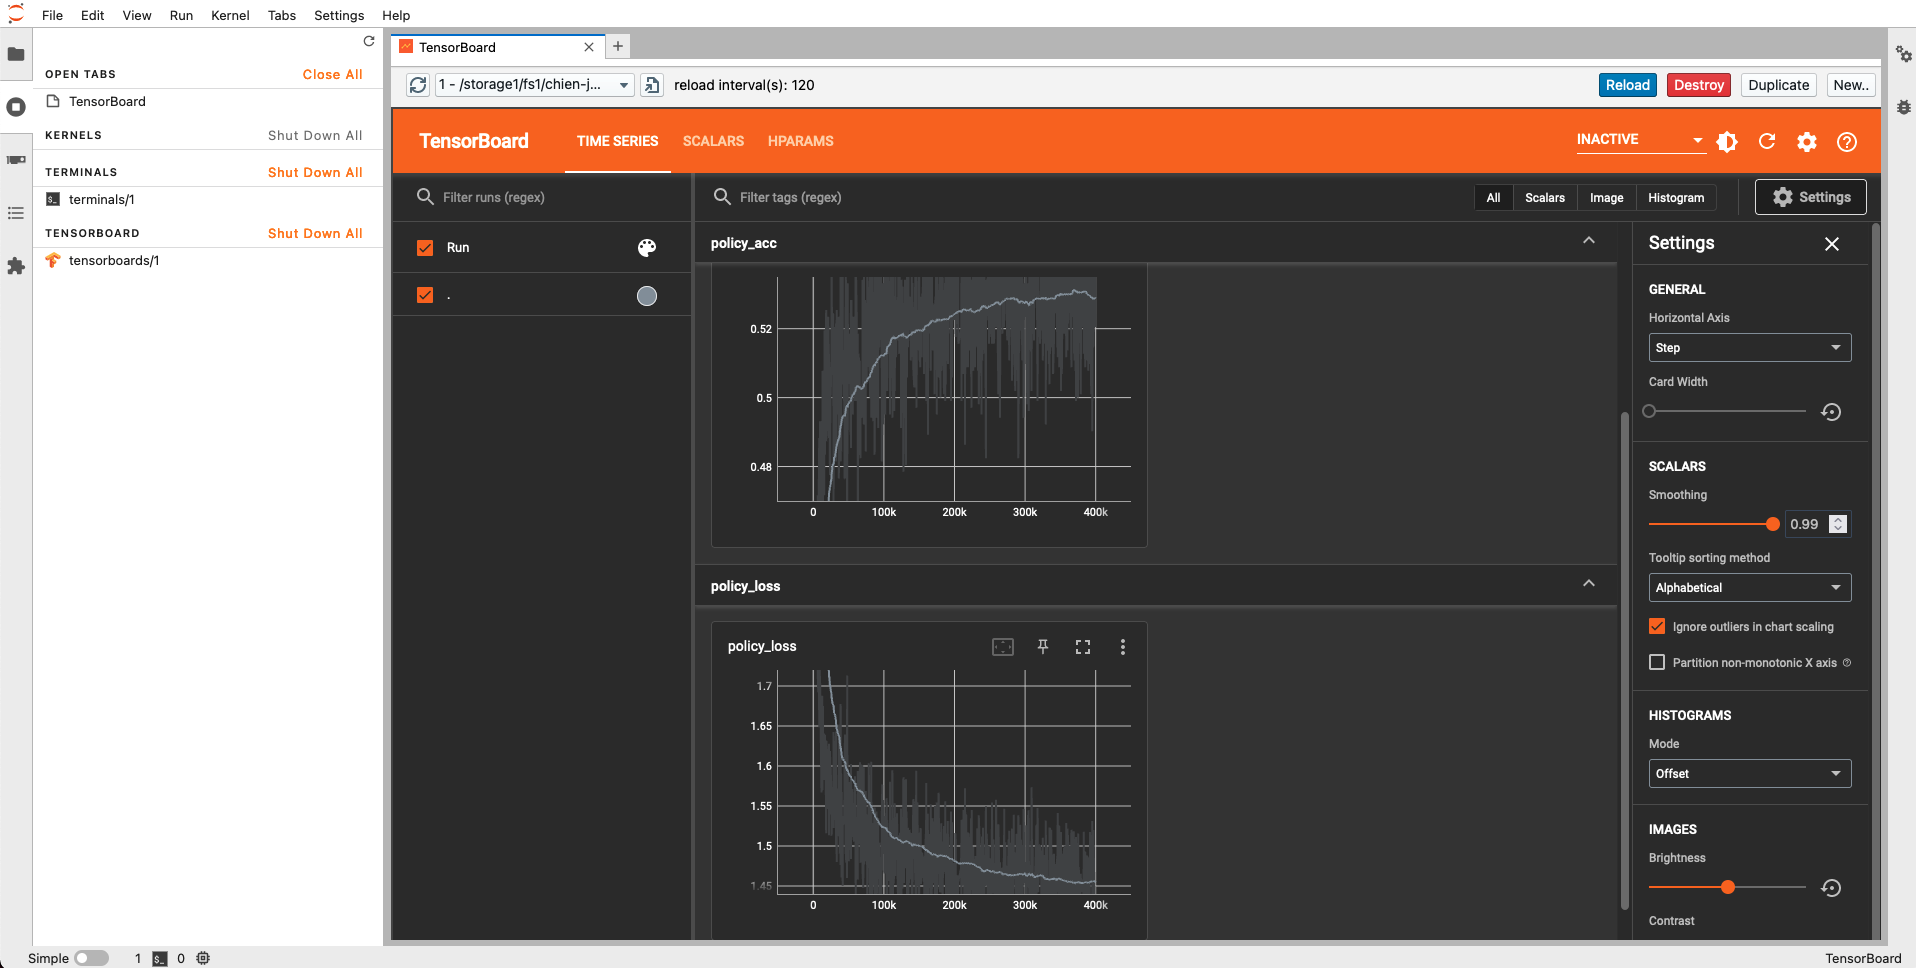
If you plan on using Tensorboard inside Jupyter, you should install the jupyterlab-tensorboard-pro. This is very helpful if you want to inspect the metrics of your model during or after training, to help you optimize model hyperparameters. Tensorboard works with both Tensorflow and Pytorch.


0 Comments